People are facing this basic issue on routine basis, that their email address is having problem’s with their outlook. So we have tried to elaborate this topic in very easy way (with text, images and video as well) so you can fix your outlook / email configuration issues.
Step by step instructions to configure your email account in outlook is here:
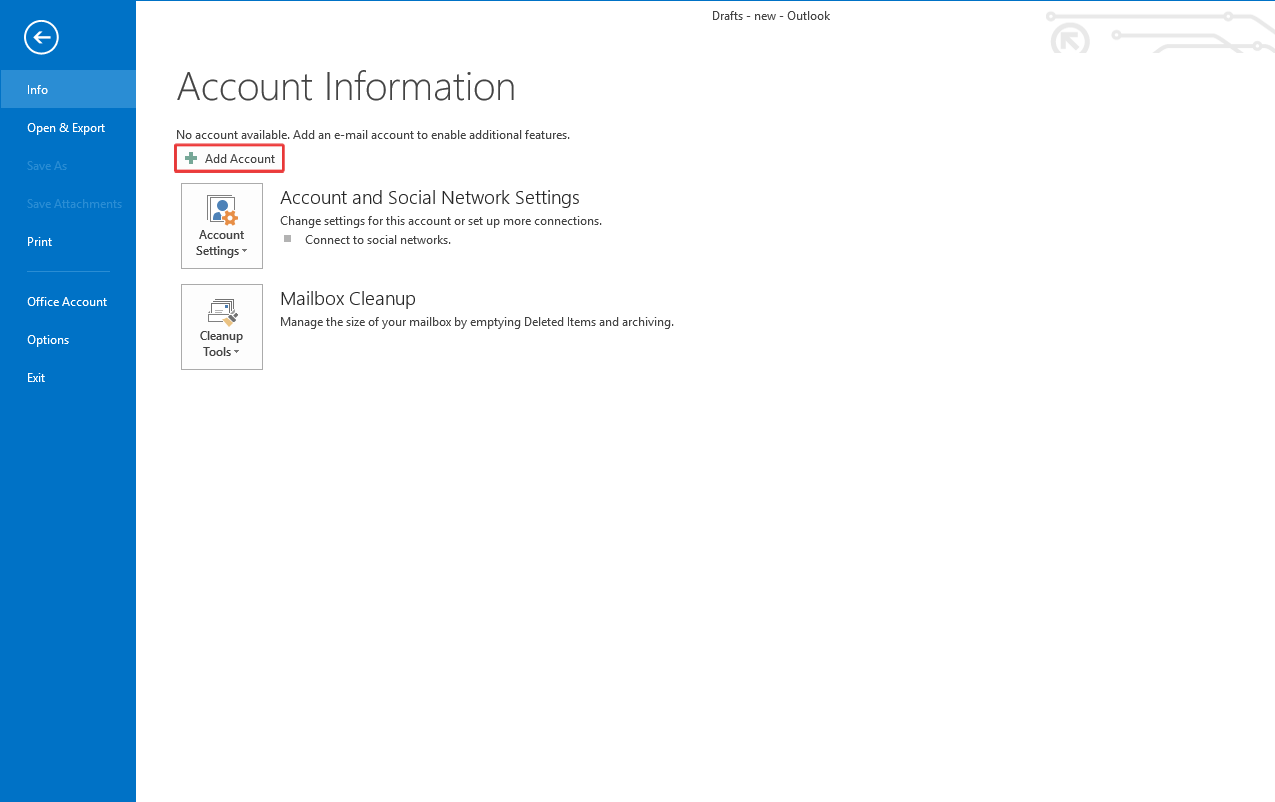
1. Add email account in Outlook
Open Outlook application on your computer (2016 or above version recommended). Then click on File option at very left side in menu bar. Then click on “Add Account” button.
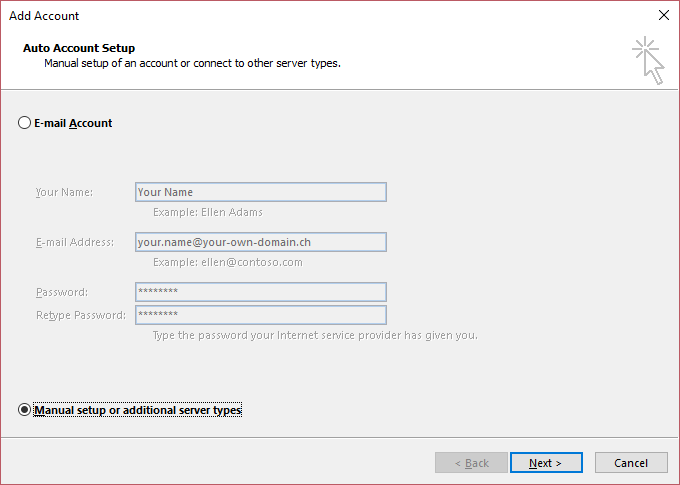
2. Manual Configuration
In most cases email accounts require custom configurations, so go with manual setup. For this choose option (Manual setup or additional server types) then click Next
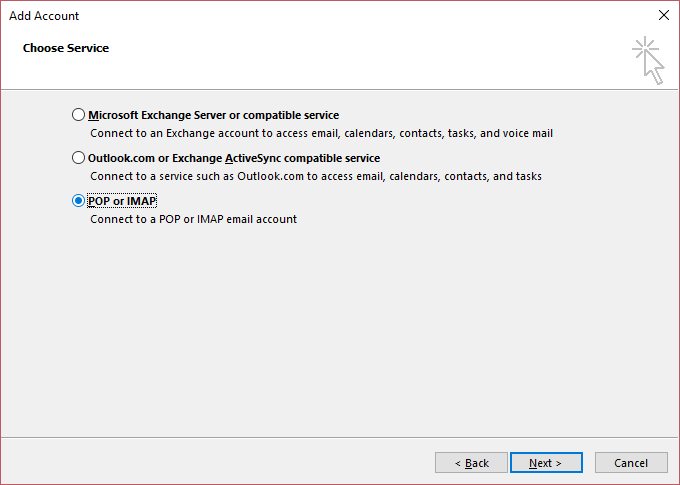
3. Choose account type: POP or IMAP
Now you have to select the account type between POP or IMAP
IMAP:
Using this option outlook will synchronize all your content on both sides (server and on your computer), each time you read an email, send an email that will be recorded on server well. This is the only way to store sent items on server well. Usually people complains about their sent items from PC are missing from server webmail, so this is the way to sync both inbox and send items on both sides.
POP:
Using this method your emails will be downloaded to your computer and POP will delete that data from server, so your all content will stay on your computer. This is best when you limited storage on server side but its very risky as well if you loose the data from computer by any mean then you have nothing left because server also have nothing due to POP.
We recommend to choose IMAP.
Note:
If you are using cybernet / stormfiber internet connection then you must ask your provider to turn on smtp services for your domain. For this follow our article SMTP / Outgoing Email Issue with Storm Fiber Internet.
Configurations
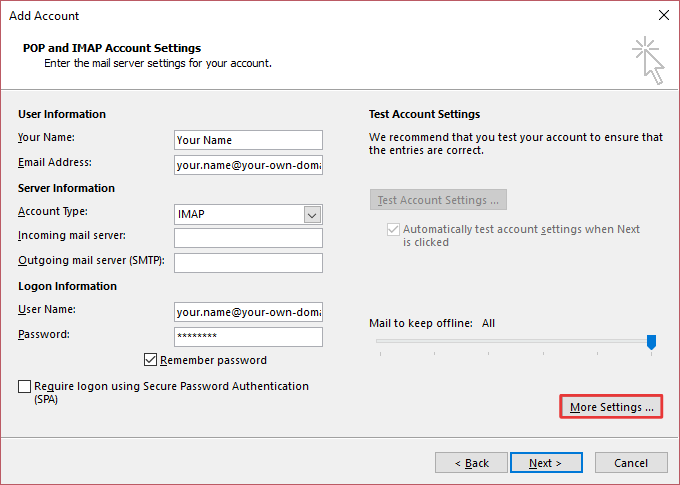
Enter your Name, this name will be shown as sender to your recipients plus this will be the account name in your outlook.
Enter your email address which you are going to configure
Select IMAP or POP
Enter Incoming mail server (Get it from your provider)
Enter Outgoing mail server SMTP (Get it from your provider)
Fill Login information (Username must be complete address + password for the account)
Then click More Settings.
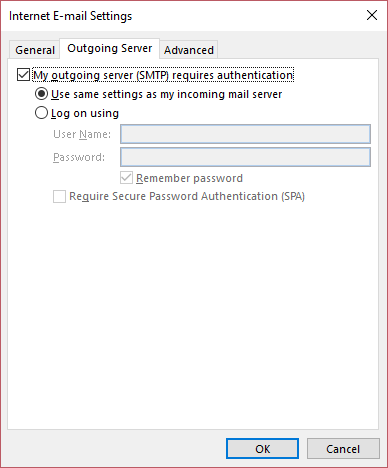
Now go to (Outgoing Server) Tab and select the option (My outgoing server (SMTP) requires authentication) always enable authentication for your outgoing emails.
Then click on (Advanced) Tab and add your incoming and outgoing ports.
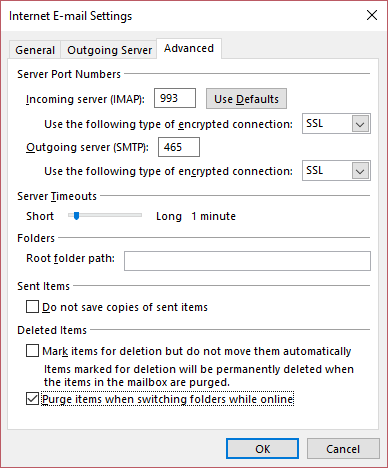
Ports we recommend:
IMAP:
Incoming: 993 – SSL
Outgoing: 465 – SSL
POP:
Incoming: 995 – SSL
Outgoing: 465 – SSL
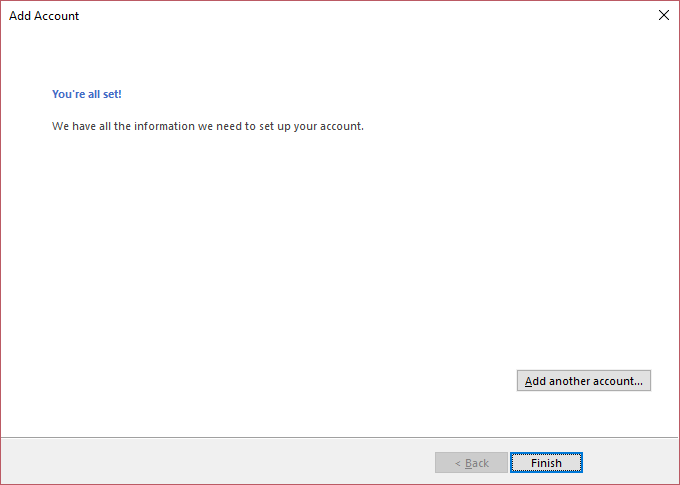
And you are done with configurations. You will get a confirmation screen.