CentOS 6.5 has been released, are you ready to install?
Following the release of RHEL 6.5, CentOS 6.5 has arrived on 1 December and its time playing with it. For those who want to upgrade their existing systems 6.4 to 6.5 just use the command Yum Update & all the magic would done.CentOS 6.5 received a package updates and new features. See the release notes for detailed information.
Choose your machine architecture and it will then present a list of mirrors. Get into any mirror and then get the torrent file to download or the direct iso download link. There are multiple download options available like LiveCD, LiveDVD, Dvd1+2, Minimal and Netinstall.
The minimal installer comes with a text based installer that would install CentOS with a shell and minimum software applications. Rest everything has to be installed from yum.
The LiveCD/LiveDVD provide the desktop and gui installer and installs the CentOS system but does not provide any package selection options.
The DvD1+2 set provide full set of all applications for those who require it.
And the netinstall would actually download the installation image and then install.
In this post we shall use the LiveCD. It is around 650MB.
Although CentOS is used mostly on servers, having a desktop system can help to create a gui based environment with a setup similar to your server.
Install
So now, its time to install CentOS onto your desktop system. Use either the LiveDVD or LiveCD to get it up and running fast.
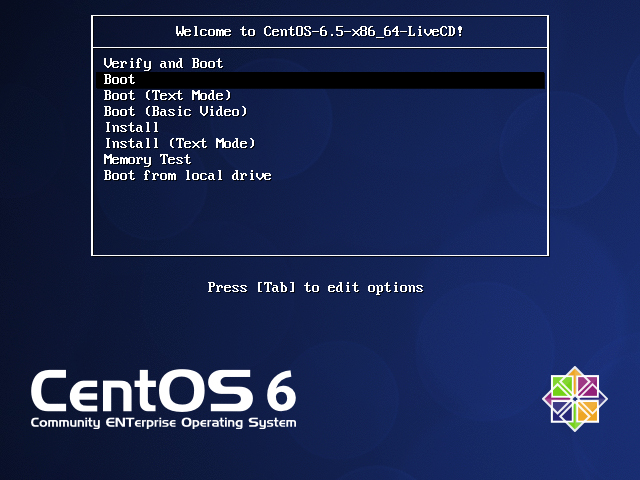
Put in the media and reboot. The boot menu will have many options with self explanatory names. Select Boot to get onto the Live desktop.

Double clicks the Install icon on the desktop, to start the Anaconda installer.
Click Next on the installer wizard.

Keyboard layout – The next step would ask you to select the keyboard layout which should be USA for most english users.

Storage type – After the keyboard layout, comes the option select the type of storage on which CentOS is to be installed. For local hard drives, its Basic storage.

Hostname – In the next step the anaconda installer asks for a hostname. So fill it appropriately. If not sure, just enter something like mypc or hplaptop.

Timezone – Then comes the timezone selection

Root Password… Next in turn is the root password which, as you know should be a strong one.

Formatting… Now the assistant wanted to know, how you want to format the storage device. If you want to format the drive yourself, then select “Custom Layout” and create partitions as needed. For the sake of this tutorial, we select the first option, which is to use the entire device and let CentOS format as he loves.

Copying files…Now, the installer begins copying files. Nothing to do except wait and watch. The installer LiveCD essentially copies of the CD image on the hard drive. You do not get an opportunity to select packages to install or omit. In addition, the live CD comes with a minimum collection of software and applications.

Post install configuration
After the installation completes and reboots, the welcome wizard would come up which would further configure the system.

License Agreement – Like all software centos too comes with a license that is very minimal and only a few lines. So accept it.

Create User – Now its time to create a user account for yourself to be able to use the system.

Current date & time – Now input the current date and time and select the option to synchronize over the network.

Kdump – This is the last step of the welcome wizard that asks whether kdump should be enabled or not. It is a good idea to enable it.

Start CentOS 6.5
After the previous step, the system would be rebooted, and finally comes the login page.

And after login comes the shiny new CentOS 6.5 desktop
